Skip the reading
Open the PNG → JPG converter
No watermark, no upload, no account. Runs in your browser.
Mac screenshots, design exports, and downloaded graphics are almost always PNG. PNG is lossless and perfect for sharp edges, but it makes for big files - a full-screen screenshot can be several megabytes. When you need a smaller file to email, upload, or attach, JPG is the answer.
This guide shows the fastest way to convert PNG to JPG on a Mac: a free browser-based converter that runs entirely on your machine. No app to install, no upload, no watermark.
TL;DR
- On your Mac, open converter.encodehive.com/png-to-jpg.
- Drag your PNG onto the drop zone (or drop several to batch convert).
- Leave the quality at 85, then click Convert to JPEG.
- Click Save on each finished file.
No upload, no watermark, no account. The conversion happens in your browser.
When should you convert PNG to JPG?
Convert to JPG when file size matters and the image is a photo: a photograph, a screenshot of a photo, a rendered image with smooth gradients. JPG compresses those beautifully, often cutting 60-80% of the size with no visible loss.
Keep it as PNG when the image has sharp edges or transparency: logos, icons, line art, UI screenshots with crisp text, or anything with a transparent background. JPG’s compression smears hard edges, and it cannot store transparency at all (see the FAQ below).
Convert PNG to JPG on your Mac, step by step
1. Open the converter
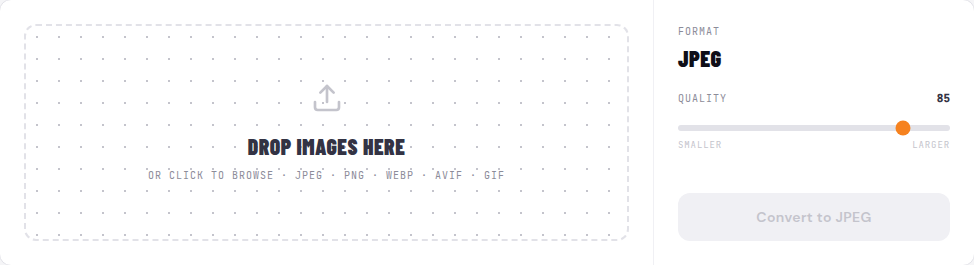
Go to converter.encodehive.com/png-to-jpg in Safari, Chrome, or any browser. The page loads instantly - no signup, no popup, no cookie banner.
2. Drop your PNG onto the page

Drag a PNG straight from Finder onto the dashed box (“Drop images here”), or click it to open the file picker. To batch convert, select several PNGs at once - the converter queues them all.
3. Set the quality and click Convert to JPEG
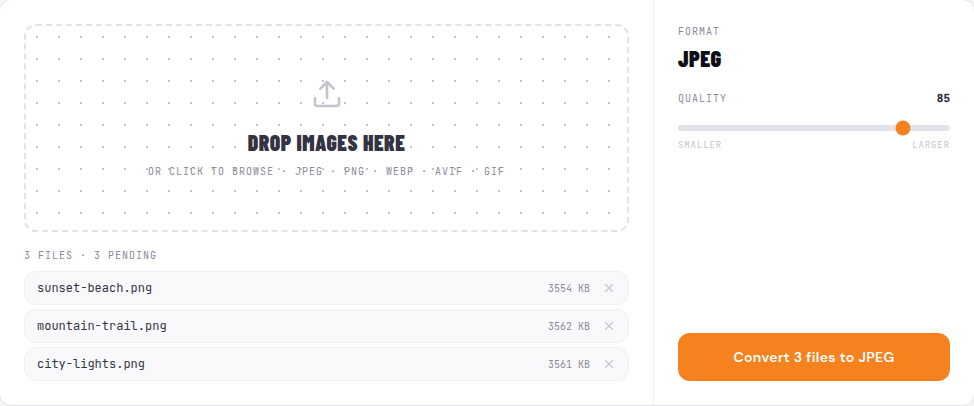
On the right you’ll see the output format - locked to JPEG on this page - and a Quality slider. It defaults to 85, which is visually lossless for almost any photo. Drag it down toward Smaller for a tinier file, or up toward Larger to keep more detail. When you’re happy, click Convert to JPEG.
Conversion is near-instant - it’s a local encode, not an upload, so even a batch finishes in a second or two.
4. Save the JPG
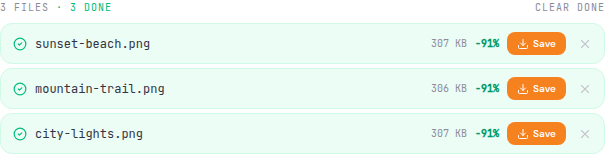
Each finished file shows its new size and a green badge with how much smaller it got (for example -68%). Click the Save button to download the JPG to your Downloads folder. The original PNG is untouched - the JPG is a brand-new file.
Converted a batch? Click Save on each one, then hit Clear done to tidy the list.
On Windows 10 / 11
The exact same page works in Edge or Chrome on Windows. Drop the PNG, set the quality, click Convert to JPEG, then Save. You don’t need Paint, the Photos app, or the old “Save as type” trick - and unlike those, this handles a whole folder of PNGs in one go.
On iPhone and iPad
Open the page in Safari, tap the drop zone, and pick a PNG from Files or Photos. Tap Convert to JPEG, then Save - iOS lets you save the JPG back to Files or straight into your Photos library.
Why not just use Preview (or Photoshop)?
You can - and for a single file, Preview is fine: open the PNG, File > Export, choose JPEG, drag the quality slider. The browser converter wins in two situations:
- Batches. Preview exports one file at a time. Photoshop can batch with an action or Image Processor, but that’s a lot of setup for a one-off. Dropping 20 PNGs onto a web page and clicking once is faster.
- Photoshop isn’t installed. Most people converting a screenshot don’t have Photoshop, and don’t want a subscription for it. This needs nothing but a browser.
And because the conversion is local, it’s just as private as Preview - nothing uploads.
Will I lose quality or transparency?
- Quality: at 85 the loss is imperceptible on photos. For archival originals, keep the PNG; for sharing and uploading, JPG is the right trade.
- Transparency: JPG has no transparency channel, so transparent areas become a solid fill (this tool renders them black). If transparency matters, keep the PNG, or convert to WebP, which is small and keeps transparency.
Related guides
- How to convert WebP to JPG on Windows - the other format that won’t open in old apps
- How to batch convert images to WebP for a website - smaller than JPG, with transparency
- Convert images without uploading - why local conversion is more private
FAQ
Frequently asked
How do I convert a PNG to JPG on a Mac without extra software?
Open converter.encodehive.com/png-to-jpg/ in any browser, drag your PNG onto the page, and click Convert to JPEG. It runs entirely in the browser, so there is nothing to install. Mac also has a built-in option - open the PNG in Preview, then File > Export and choose JPEG - but Preview only does one file at a time and re-exporting screenshots one by one gets tedious.
Does converting PNG to JPG lose quality?
JPG is a lossy format, so a tiny amount of detail is discarded - but at the default quality of 85 you will not see a difference on a photo. PNG is lossless and usually much larger; JPG trades a sliver of quality you cannot perceive for a file that is often 60-80% smaller. For line art, text, or screenshots with sharp edges, PNG actually looks cleaner, so keep those as PNG.
How do I batch convert PNG to JPG on Mac?
Drop all your PNGs onto the converter at once - it queues every file and converts them one after another. When they finish, click Save on each, or use your browser's bulk-download. This is faster than Preview (one file at a time) and does not need a Photoshop action or the command line.
Will I lose transparency when I convert PNG to JPG?
Yes - JPG cannot store transparency. Any transparent areas in the PNG are filled with a solid background (this tool renders them black) because the JPG format has no alpha channel. If your image relies on transparency - a logo or sticker - keep it as PNG or convert to WebP instead, which supports transparency and is also smaller.
Does this upload my images to a server?
No. The conversion runs in your browser using a WebAssembly JPEG encoder, so your images never leave your Mac. You can confirm it by turning on Airplane Mode after the page loads - the conversion still works offline.
How do I convert PNG to JPG on Windows 11 or iPhone?
The same page works everywhere. On Windows 11, open it in Edge or Chrome, drop the PNG, and click Convert to JPEG (no need for Paint or the Photos app). On iPhone, open it in Safari, tap the drop zone to pick a PNG from Files or Photos, convert, then Save to Files or Photos.